No edit summary |
Mar1988 PL (talk | contribs) No edit summary |
||
| (3 intermediate revisions by 2 users not shown) | |||
| Line 1: | Line 1: | ||
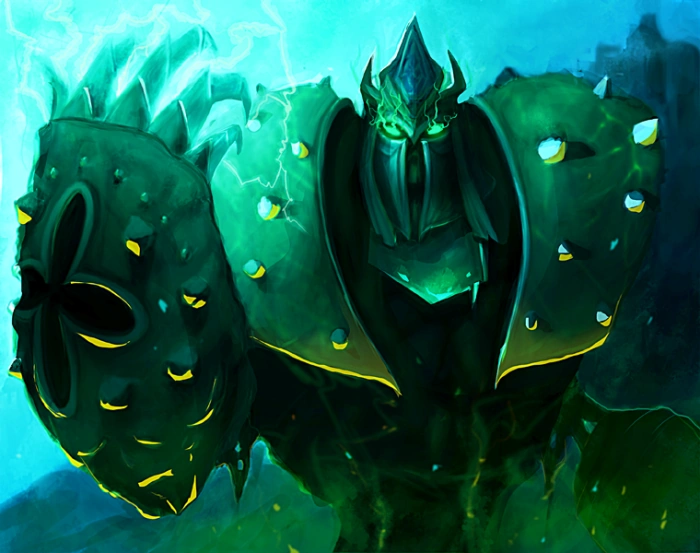
| + | [[File:Polidoras.png|thumb]]Morduun: ''An overwelming sense of death emanates from Morduun in waves.'' |
||
| + | Morduun is one of the most common raid bosses. He gets unlocked when you have finished the [[Book_2_Chapter_03._The_Black_Pits|third chapter]] of [[Book_2:_Corruption_of_the_Heart|Book 2]]. <br /> |
||
| + | You can only attack Morduun with Energy. |
||
| − | Morduun (Energy) is the First Boss unlocked by the player in Book 2.[[File:Polidoras.png|thumb]] |
||
{| align="left" border="1" cellpadding="1" cellspacing="1" style="width: 500px;" |
{| align="left" border="1" cellpadding="1" cellspacing="1" style="width: 500px;" |
||
| − | |Name (Tier) |
+ | |'''Name (Tier)''' |
| + | |'''Cost [[File:Gold 50x50.png|17 px]]''' |
||
| ⚫ | |||
| − | |Notable Drops |
+ | |'''Notable Drops''' |
| − | | |
+ | |'''Total HP''' |
|- |
|- |
||
|Morduun I |
|Morduun I |
||
| Line 14: | Line 16: | ||
|Morduun II |
|Morduun II |
||
| style="text-align: center;"|25,000 |
| style="text-align: center;"|25,000 |
||
| − | | |
+ | |[[Dismantled_Ultra_Shot|Pieces of the Gierdon Ultra Shot]] |
| style="text-align: center;"|1,200,000 |
| style="text-align: center;"|1,200,000 |
||
|- |
|- |
||
|Morduun III |
|Morduun III |
||
| style="text-align: center;"|50,000 |
| style="text-align: center;"|50,000 |
||
| + | |[[Dismantled_Ultra_Shot|Pieces of the Gierdon Ultra Shot]] |
||
| ⚫ | |||
| style="text-align: center;"|2,800,000 |
| style="text-align: center;"|2,800,000 |
||
|- |
|- |
||
|Morduun IV |
|Morduun IV |
||
| style="text-align: center;"|75,000 |
| style="text-align: center;"|75,000 |
||
| + | |[[Dismantled_Ultra_Shot|Pieces of the Gierdon Ultra Shot]] |
||
| ⚫ | |||
| style="text-align: center;"|5,500,000 |
| style="text-align: center;"|5,500,000 |
||
|- |
|- |
||
| − | |Morduun |
+ | |Morduun V |
| style="text-align: center;"|150,000 |
| style="text-align: center;"|150,000 |
||
| + | |[[Dismantled_Ultra_Shot|Pieces of the Gierdon Ultra Shot]] |
||
| ⚫ | |||
| style="text-align: center;"|11,000,000 |
| style="text-align: center;"|11,000,000 |
||
| ⚫ | |||
| + | <br /> |
||
| + | <br /> |
||
| + | <br /> |
||
| + | <br /> |
||
| + | <br /> |
||
| + | <br /> |
||
| + | <br /> |
||
| + | <br /> |
||
| + | <br /> |
||
| + | <br /> |
||
| + | <br /> |
||
| + | <br /> |
||
| + | {| border="1" cellpadding="1" cellspacing="1" style="width: 500px;" |
||
| + | | colspan="5" style="text-align: center;"|'''Item Loot * ''' |
||
| ⚫ | |||
| + | | style="text-align: center;"|'''Item Count''' |
||
| + | | colspan="4" rowspan="1" style="text-align: center;"|'''Damage ''' |
||
| ⚫ | |||
| + | | style="text-align: center; vertical-align: middle; width: 50px;"|Lvl |
||
| + | | style="text-align: center; vertical-align: middle; width: 50px;"|1 - 29 |
||
| + | | style="text-align: center; vertical-align: middle; width: 50px;"|30 - 49 |
||
| + | | style="text-align: center; vertical-align: middle; width: 50px;"|50 - 79 |
||
| + | | style="text-align: center; vertical-align: middle; width: 50px;"|80+ |
||
| + | |- |
||
| + | | style="text-align: center; vertical-align: middle; width: 50px;"|1 |
||
| + | | style="text-align: center; vertical-align: middle; width: 50px;"|10 |
||
| + | | style="text-align: center; vertical-align: middle; width: 50px;"|100 |
||
| + | | style="text-align: center; vertical-align: middle; width: 50px;"|1,000 |
||
| + | | style="text-align: center; vertical-align: middle; width: 50px;"|5,000 |
||
| + | |- |
||
| + | | style="text-align: center; vertical-align: middle; width: 50px;"|2 |
||
| + | | style="text-align: center; vertical-align: middle; width: 50px;"|100 |
||
| + | | style="text-align: center; vertical-align: middle; width: 50px;"|500 |
||
| + | | style="text-align: center; vertical-align: middle; width: 50px;"|5,000 |
||
| + | | style="text-align: center; vertical-align: middle; width: 50px;"|20,000 |
||
| + | |- |
||
| + | | style="text-align: center; vertical-align: middle; width: 50px;"|3 |
||
| + | | style="text-align: center; vertical-align: middle; width: 50px;"|300 |
||
| + | | style="text-align: center; vertical-align: middle; width: 50px;"|1,000 |
||
| + | | style="text-align: center; vertical-align: middle; width: 50px;"|12,500 |
||
| + | | style="text-align: center; vertical-align: middle; width: 50px;"|50,000 |
||
| + | |- |
||
| + | | style="text-align: center; vertical-align: middle; width: 50px;"|4 |
||
| + | | style="text-align: center; vertical-align: middle; width: 50px;"| - |
||
| + | | style="text-align: center; vertical-align: middle; width: 50px;"|5,000 |
||
| + | | style="text-align: center; vertical-align: middle; width: 50px;"|25,000 |
||
| + | | style="text-align: center; vertical-align: middle; width: 50px;"|100,000 |
||
| + | |- |
||
| + | | style="text-align: center; vertical-align: middle; width: 50px;"|5 |
||
| + | | style="text-align: center; vertical-align: middle; width: 50px;"| - |
||
| + | | style="text-align: center; vertical-align: middle; width: 50px;"|20,000 |
||
| + | | style="text-align: center; vertical-align: middle; width: 50px;"|75,000 |
||
| + | | style="text-align: center; vertical-align: middle; width: 50px;"|200,000 |
||
|} |
|} |
||
| + | {| border="1" cellpadding="1" cellspacing="1" style="width: 500px;" |
||
| − | |||
| + | | style="text-align: center;"|'''Bonus Level''' |
||
| − | |||
| + | | style="text-align: center;"|'''Tier I''' |
||
| − | |||
| + | | style="text-align: center;"|'''Tier II''' |
||
| − | |||
| + | | style="text-align: center;"|'''Tier III''' |
||
| − | |||
| + | | style="text-align: center;"|'''Tier IV''' |
||
| − | |||
| + | | style="text-align: center;"|'''Tier V''' |
||
| − | |||
| + | |- |
||
| − | |||
| ⚫ | |||
| − | |||
| + | | style="text-align: center;"|- |
||
| − | |||
| + | | style="text-align: center;"|24,000 |
||
| − | |||
| + | | style="text-align: center;"|56,000 |
||
| − | |||
| + | | style="text-align: center;"|110,000 |
||
| − | |||
| + | | style="text-align: center;"|220,000 |
||
| − | |||
| + | |- |
||
| − | |||
| + | | style="text-align: center;"|2 |
||
| − | |||
| + | | style="text-align: center;"|- |
||
| − | |||
| + | | style="text-align: center;"|36,000 |
||
| − | |||
| + | | style="text-align: center;"|84,000 |
||
| − | |||
| + | | style="text-align: center;"|165,000 |
||
| − | |||
| + | | style="text-align: center;"|330,000 |
||
| − | ^^ Note: A tier 1 Mord has never been seen, since by the time you can create him, you will be a Tier 2 Player. |
||
| + | |- |
||
| + | | style="text-align: center;"|3 |
||
| + | | style="text-align: center;"|- |
||
| + | | style="text-align: center;"|48,000 |
||
| + | | style="text-align: center;"|112,000 |
||
| + | | style="text-align: center;"|220,000 |
||
| + | | style="text-align: center;"|440,000 |
||
| + | |- |
||
| + | | style="text-align: center;"|4 |
||
| + | | style="text-align: center;"|- |
||
| + | | style="text-align: center;"|60,000 |
||
| + | | style="text-align: center;"|140,000 |
||
| + | | style="text-align: center;"|275,000 |
||
| + | | style="text-align: center;"|550,000 |
||
| + | |- |
||
| + | | style="text-align: center;"|5 |
||
| + | | style="text-align: center;"|- |
||
| + | | style="text-align: center;"|96,000 |
||
| + | | style="text-align: center;"|196,000 |
||
| + | | style="text-align: center;"|385,000 |
||
| + | | style="text-align: center;"|770,000 |
||
| + | |- |
||
| + | | style="text-align: center;"|6 |
||
| + | | style="text-align: center;"|- |
||
| + | | style="text-align: center;"|120,000 |
||
| + | | style="text-align: center;"|280,000 |
||
| + | | style="text-align: center;"|550,000 |
||
| + | | style="text-align: center;"|1,100,000 |
||
| + | |- |
||
| + | | style="text-align: center;"|7 |
||
| + | | style="text-align: center;"|- |
||
| + | | style="text-align: center;"|180,000 |
||
| + | | style="text-align: center;"|420,000 |
||
| + | | style="text-align: center;"|825,000 |
||
| + | | style="text-align: center;"|1,650,000 |
||
| + | |} |
||
| + | <span style="font-size:10px;">*Each player can receive up to 5 loot drops per raid. The number of drops, max item tier and chance of getting better items are based on your damage and increase as you fight higher tier raids. Max item tier does not guarantee a drop of that tier. There are 7 bonus levels. Each bonus level increases your chance of getting better drops.</span> |
||
[[Category:Raids]] |
[[Category:Raids]] |
||
Latest revision as of 15:16, 17 March 2014
Morduun: An overwelming sense of death emanates from Morduun in waves.
Morduun is one of the most common raid bosses. He gets unlocked when you have finished the third chapter of Book 2.
You can only attack Morduun with Energy.
| Name (Tier) | Cost |
Notable Drops | Total HP |
| Morduun I | -- | -- | |
| Morduun II | 25,000 | Pieces of the Gierdon Ultra Shot | 1,200,000 |
| Morduun III | 50,000 | Pieces of the Gierdon Ultra Shot | 2,800,000 |
| Morduun IV | 75,000 | Pieces of the Gierdon Ultra Shot | 5,500,000 |
| Morduun V | 150,000 | Pieces of the Gierdon Ultra Shot | 11,000,000 |
| Item Loot * | ||||
| Item Count | Damage | |||
| Lvl | 1 - 29 | 30 - 49 | 50 - 79 | 80+ |
| 1 | 10 | 100 | 1,000 | 5,000 |
| 2 | 100 | 500 | 5,000 | 20,000 |
| 3 | 300 | 1,000 | 12,500 | 50,000 |
| 4 | - | 5,000 | 25,000 | 100,000 |
| 5 | - | 20,000 | 75,000 | 200,000 |
| Bonus Level | Tier I | Tier II | Tier III | Tier IV | Tier V |
| 1 | - | 24,000 | 56,000 | 110,000 | 220,000 |
| 2 | - | 36,000 | 84,000 | 165,000 | 330,000 |
| 3 | - | 48,000 | 112,000 | 220,000 | 440,000 |
| 4 | - | 60,000 | 140,000 | 275,000 | 550,000 |
| 5 | - | 96,000 | 196,000 | 385,000 | 770,000 |
| 6 | - | 120,000 | 280,000 | 550,000 | 1,100,000 |
| 7 | - | 180,000 | 420,000 | 825,000 | 1,650,000 |
*Each player can receive up to 5 loot drops per raid. The number of drops, max item tier and chance of getting better items are based on your damage and increase as you fight higher tier raids. Max item tier does not guarantee a drop of that tier. There are 7 bonus levels. Each bonus level increases your chance of getting better drops.