No edit summary Tags: Visual edit apiedit |
No edit summary Tags: Visual edit apiedit |
||
| (7 intermediate revisions by the same user not shown) | |||
| Line 85: | Line 85: | ||
'''Quest Locations''' |
'''Quest Locations''' |
||
<br\ /> |
<br\ /> |
||
| − | [[File:Adventures.png]] [[Adventures: Tombs of Kragstaad|'''Adventures:''' Tombs of Kragstaad]]<br\ /> |
+ | [[File:Adventures Cog.png]] [[Adventures: Tombs of Kragstaad|'''Adventures:''' Tombs of Kragstaad]]<br\ /> |
<br\ /> |
<br\ /> |
||
| − | [[File:Adventures.png]] [[Adventures: The Tombs: Part II|'''Adventures:''' The Tombs: Part II]]<br\ /> |
+ | [[File:Adventures Cog.png]] [[Adventures: The Tombs: Part II|'''Adventures:''' The Tombs: Part II]]<br\ /> |
<br\ /> |
<br\ /> |
||
| − | [[File:Adventures.png]] [[Adventures: The Tombs: Part III|'''Adventures:''' The Tombs: Part III]]<br\ /> |
+ | [[File:Adventures Cog.png]] [[Adventures: The Tombs: Part III|'''Adventures:''' The Tombs: Part III]]<br\ /> |
<br\ /> |
<br\ /> |
||
| − | [[File:Adventures.png]] [[Adventures: The Tombs: Part IV|'''Adventures:''' The Tombs: Part IV]]<br\ /> |
+ | [[File:Adventures Cog.png]] [[Adventures: The Tombs: Part IV|'''Adventures:''' The Tombs: Part IV]]<br\ /> |
<br\ /> |
<br\ /> |
||
| − | [[File:Adventures.png]] [[Adventures: Plane of Havoc|'''Adventures:''' The Plane of Havoc]]<br\ /> |
+ | [[File:Adventures Cog.png]] [[Adventures: Plane of Havoc|'''Adventures:''' The Plane of Havoc]]<br\ /> |
<br\ /> |
<br\ /> |
||
| Line 105: | Line 105: | ||
==Raids== |
==Raids== |
||
| + | {| width="100%" |
||
| − | ''' Book 1''' '''Book 2''' '''Book 3''' |
||
| + | |<center>'''Book 1'''</center> |
||
| + | |<center>'''Book 2'''</center> |
||
| + | |<center>'''Book 3'''</center> |
||
| + | |} |
||
| + | {| width="100%" |
||
| + | |<center>[[File:Outereaches small.jpg]]</center> |
||
| + | <center>[[Outereaches]]</center> |
||
| + | |<center>[[File:Heren small.jpg]]</center> |
||
| + | <center>[[Heren]]</center> |
||
| + | |<center>[[File:Kragstaad small.jpg]]</center> |
||
| + | <center>[[Kragstaad]]</center> |
||
| + | |<center>[[File:Drowning woods small.jpg]]</center> |
||
| + | <center>[[Drowning Woods]]</center> |
||
| + | |} |
||
| + | {| width="100%" |
||
| + | |<center>'''Bosses'''</center> |
||
| + | |<center>'''Bosses'''</center> |
||
| + | |<center>'''Bosses'''</center> |
||
| + | |} |
||
| + | {| width="100%" |
||
| + | |<center>[[File:Barrg.png|100px]]</center> |
||
| + | <center>[[Barrg]]</center> |
||
| + | |<center>[[File:Sorivun.png|100px]]</center> |
||
| + | <center>[[Sorivun]]</center> |
||
| + | |<center>[[File:Grax.png|100px]]</center> |
||
| + | <center>[[Grax The Destroyer|Grax]]</center> |
||
| + | |<center>[[File:Polidoras small.jpg|100px]]</center> |
||
| + | <center>[[Polidoras]]</center> |
||
| + | |<center>[[File:Morduun small.jpg|100px]]</center> |
||
| + | <center>[[Morduun]]</center> |
||
| + | |<center>[[File:Nyx.png|100px]]</center> |
||
| + | <center>[[Nyx]]</center> |
||
| + | |<center>[[File:Dorgar small.jpg|100px]]</center> |
||
| + | <center>[[Dorgar]]</center> |
||
| + | |<center>[[File:Ssyth small.jpg|100px]]</center> |
||
| + | <center>[[Ssyth|S'syth]]</center> |
||
| + | |} |
||
| + | {| width="100%" |
||
| + | |<center>'''End Boss'''</center> |
||
| + | <center>[[File:Corvinus.png|100px]]</center> |
||
| + | <center>[[Corvinus]]</center> |
||
| + | |<center>'''End Boss'''</center> |
||
| + | <center>[[File:Valta 140x111.jpg|100px]]</center> |
||
| + | <center>[[Priestess Valta]]</center> |
||
| + | |<center>'''End Boss'''</center> |
||
| + | <center>[[File:Marras 140x111.jpg|100px]]</center> |
||
| + | <center>[[Marras|Marras the Demonlord]]</center> |
||
| + | |} |
||
<br\ /> |
<br\ /> |
||
| + | {| width="100%" |
||
| − | [[File:Outereaches small.jpg]] [[File:Heren small.jpg]] [[File:Kragstaad small.jpg]] [[File:Drowning woods small.jpg]] |
||
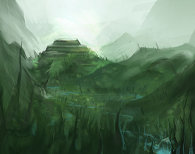
| + | |<center>'''Book 4'''</center> |
||
| − | <br\ /> |
||
| + | |<center>'''Book 5'''</center> |
||
| − | [[Outereaches]] [[Heren]] [[Kragstaad]] [[Drowning Woods]] |
||
| + | |<center>'''Book 6'''</center> |
||
| − | |||
| + | |} |
||
| − | ''' Bosses''' '''Bosses''' '''Bosses''' |
||
| + | {| width="100%" |
||
| − | <br\ /> |
||
| + | |<center>[[File:Plane of fire small.jpg]]</center> |
||
| − | [[File:Barrg.png|100px]] [[File:Sorivun.png|100px]] [[File:Grax.png|100px]] [[File:Polidoras small.jpg|100px]] [[File:Morduun small.jpg|100px]] [[File:Nyx.png|100px]] [[File:Dorgar small.jpg|100px]] [[File:Ssyth small.jpg|100px]] |
||
| + | <center>[[Plane of Fire]]</center> |
||
| − | <br\ /> |
||
| + | |<center>[[File:City of andara small.jpg]]</center> |
||
| − | [[Barrg]] [[Sorivun]] [[Grax The Destroyer|Grax]] [[Polidoras]] [[Morduun]] [[Nyx]] [[Dorgar]] [[Ssyth|S'syth]] |
||
| + | <center>[[City of Andara]]</center> |
||
| − | |||
| + | |<center>[[File:B6 kirsinti mountains small.jpg]]</center> |
||
| − | ''' End Boss''' '''End Boss''' '''End Boss''' |
||
| + | <center>[[Kirsinti Mountains]]</center> |
||
| − | <br\ /> |
||
| + | |} |
||
| − | [[File:Corvinus.png|100px]] [[File:Valta 140x111.jpg|100px]] [[File:Marras 140x111.jpg|100px]] |
||
| + | {| width="100%" |
||
| − | <br\ /> |
||
| + | |<center>'''Bosses'''</center> |
||
| − | [[Corvinus]] [[Priestess Valta]] [[Marras|Marras the Demonlord]] |
||
| + | |<center>'''Bosses'''</center> |
||
| − | |||
| + | |<center>'''Bosses'''</center> |
||
| − | |||
| + | |} |
||
| − | |||
| + | {| width="100%" |
||
| − | '''Book 4''' '''Book 5''' '''Book 6''' |
||
| + | |<center>[[File:Blazar small.jpg|100px]]</center> |
||
| − | <br\ /> |
||
| + | <center>[[Blazar the Inferno|Blazar]]</center> |
||
| − | [[File:Plane of fire small.jpg]] [[File:City of andara small.jpg]] [[File:B6 kirsinti mountains small.jpg]] |
||
| + | |<center>[[File:Romm small.jpg|100px]]</center> |
||
| − | <br\ /> |
||
| + | <center>[[Romm the Unmovable|Romm]]</center> |
||
| − | [[Plane of Fire]] [[City of Andara]] [[Kirsinti Mountains]] |
||
| + | |<center>[[File:B5 andaran small.jpg|100px]]</center> |
||
| − | |||
| + | <center>[[Shalah the Andaran|Shalah]]</center> |
||
| − | '''Bosses''' '''Bosses''' '''Bosses''' |
||
| + | |<center>[[File:B5 kraken small.jpg|100px]]</center> |
||
| − | <br\ /> |
||
| + | <center>[[The Kraken]]</center> |
||
| − | [[File:Blazar small.jpg|100px]] [[File:Romm small.jpg|100px]] [[File:B5 andaran small.jpg|100px]] [[File:B5 kraken small.jpg|100px]] [[File:B6 galor small.jpg|100px]] [[File:B6 myksal small.jpg|100px]] |
||
| + | |<center>[[File:B6 galor small.jpg|100px]]</center> |
||
| − | <br\ /> |
||
| + | <center>[[Galor]]</center> |
||
| − | [[Blazar the Inferno|Blazar]] [[Romm the Unmovable|Romm]] [[Shalah the Andaran|Shalah]] [[The Kraken]] [[Galor]] [[Myksal]] |
||
| + | |<center>[[File:B6 myksal small.jpg|100px]]</center> |
||
| − | |||
| + | <center>[[Myksal]]</center> |
||
| − | '''End Boss''' '''End Boss''' '''End Boss''' |
||
| + | |} |
||
| − | <br\ /> |
||
| + | {| width="100%" |
||
| − | [[File:Khan 140x111.jpg|100px]] [[File:Zari 140x111.jpg|100px]] [[File:Overlord 140x111.jpg|100px]] |
||
| + | |<center>'''End Boss'''</center> |
||
| − | <br\ /> |
||
| + | <center>[[File:Khan 140x111.jpg|100px]]</center> |
||
| − | [[Khan the Conqueror]] [[The Blood of Zari]] [[The Overlord]] |
||
| + | <center>[[Khan the Conqueror]]</center> |
||
| − | |||
| + | |<center>'''End Boss'''</center> |
||
| + | <center>[[File:Zari 140x111.jpg|100px]]</center> |
||
| + | <center>[[The Blood of Zari]]</center> |
||
| + | |<center>'''End Boss'''</center> |
||
| + | <center>[[File:Overlord 140x111.jpg|100px]]</center> |
||
| + | <center>[[The Overlord]]</center> |
||
| + | |} |
||
| − | + | <center>[[Raids|More information about Raids in general can be found here.]] |
|
<br\ /> |
<br\ /> |
||
| − | + | [[Raid Damage|Information on how to calculate Raid Damage can be found here.]]</center> |
|
==Ultra Raids== |
==Ultra Raids== |
||
| Line 154: | Line 209: | ||
{| width="100%" |
{| width="100%" |
||
|<center> |
|<center> |
||
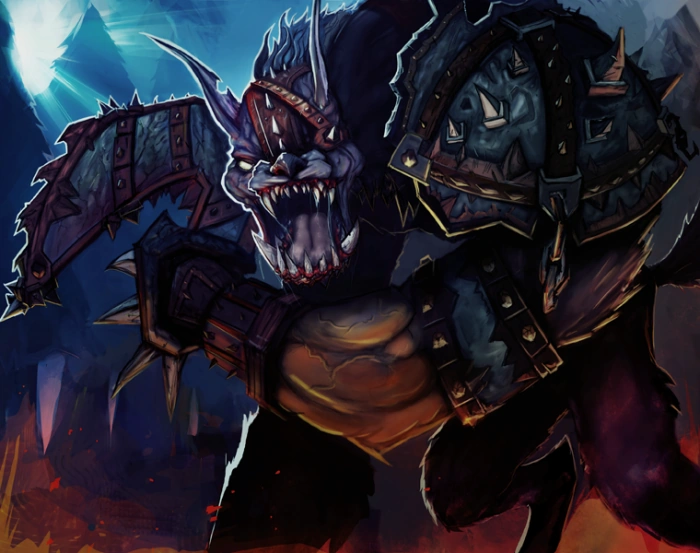
| − | <span style="font-size:15px; text-shadow: -2px 0px 5px #01046d; color:#01046d;">'''Malikar and the Dragon Knights'''</span></center><imagemap> |
+ | <span style="font-size:15px; text-shadow: -2px 0px 5px #01046d; color:#01046d;">'''Malikar and the Dragon Knights'''</span></center><center><imagemap> |
Image:Malikar and the Dragon Knights.png|500px |
Image:Malikar and the Dragon Knights.png|500px |
||
| Line 162: | Line 217: | ||
desc none |
desc none |
||
| − | </imagemap> |
+ | </imagemap></center> |
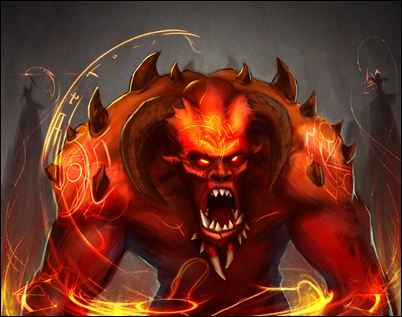
| − | |<center><span style="font-size:15px; text-shadow: -2px 0px 5px #c97c00; color:#c97c00;">'''Gog and the Demon Warriors'''</span></center><imagemap> |
+ | |<center><span style="font-size:15px; text-shadow: -2px 0px 5px #c97c00; color:#c97c00;">'''Gog and the Demon Warriors'''</span></center><center><imagemap> |
Image:Gog_and_the_Demon_Warriors.png|500px |
Image:Gog_and_the_Demon_Warriors.png|500px |
||
| Line 174: | Line 229: | ||
desc none |
desc none |
||
| − | </imagemap> |
+ | </imagemap></center> |
|} |
|} |
||
<br\ /> |
<br\ /> |
||
| Line 180: | Line 235: | ||
{| width="100%" |
{| width="100%" |
||
|<center> |
|<center> |
||
| − | <span style="font-size:15px; text-shadow: -2px 0px 5px #000000; color:#000000;">'''The Shadow Walkers'''</span></center><imagemap> |
+ | <span style="font-size:15px; text-shadow: -2px 0px 5px #000000; color:#000000;">'''The Shadow Walkers'''</span></center><center><imagemap> |
Image:The Shadow Walkers.png|500px |
Image:The Shadow Walkers.png|500px |
||
| Line 198: | Line 253: | ||
desc none |
desc none |
||
| − | </imagemap> |
+ | </imagemap></center> |
| − | |<center><span style="font-size:15px; text-shadow: -2px 0px 5px #983f04; color:#983f04;">'''The Lords of Ice and Fire'''</span></center><imagemap> |
+ | |<center><span style="font-size:15px; text-shadow: -2px 0px 5px #983f04; color:#983f04;">'''The Lords of Ice and Fire'''</span></center><center><imagemap> |
Image:The_Lords_of_Ice_and_Fire.png|500px |
Image:The_Lords_of_Ice_and_Fire.png|500px |
||
| Line 209: | Line 264: | ||
desc none |
desc none |
||
| − | </imagemap> |
+ | </imagemap></center> |
|} |
|} |
||
<br\ /> |
<br\ /> |
||
| Line 215: | Line 270: | ||
{| width="100%" |
{| width="100%" |
||
|<center> |
|<center> |
||
| − | <span style="font-size:15px; text-shadow: -2px 0px 5px #1e1a1a; color:#1e1a1a;">'''The Necromages'''</span></center><imagemap> |
+ | <span style="font-size:15px; text-shadow: -2px 0px 5px #1e1a1a; color:#1e1a1a;">'''The Necromages'''</span></center><center><imagemap> |
Image:The Necromages.png|500px |
Image:The Necromages.png|500px |
||
| Line 223: | Line 278: | ||
rect 39 59 234 472 [[Dark Mage|Dark Mage]] |
rect 39 59 234 472 [[Dark Mage|Dark Mage]] |
||
poly 501 482 670 483 667 84 522 82 444 153 446 191 521 286 482 452 485 471 [[Blood Mage|Blood Mage]] |
poly 501 482 670 483 667 84 522 82 444 153 446 191 521 286 482 452 485 471 [[Blood Mage|Blood Mage]] |
||
| − | |||
desc none |
desc none |
||
| − | </imagemap> |
+ | </imagemap></center> |
| − | |<center><span style="font-size:15px; text-shadow: -2px 0px 5px #447837; color:#447837;">'''The Drowned Knights'''</span></center><imagemap> |
+ | |<center><span style="font-size:15px; text-shadow: -2px 0px 5px #447837; color:#447837;">'''The Drowned Knights'''</span></center><center><imagemap> |
Image:The_Drowned_Knights.png|500px |
Image:The_Drowned_Knights.png|500px |
||
| Line 237: | Line 291: | ||
desc none |
desc none |
||
| − | </imagemap> |
+ | </imagemap></center> |
|} |
|} |
||
<br\ /> |
<br\ /> |
||
<br\ /> |
<br\ /> |
||
{| width="100%" |
{| width="100%" |
||
| − | |<center><span style="font-size:15px; text-shadow: -2px 0px 5px #1e1a1a; color:#EAB988;">'''Tagar the Fierce'''</span></center><imagemap> |
+ | |<center><span style="font-size:15px; text-shadow: -2px 0px 5px #1e1a1a; color:#EAB988;">'''Tagar the Fierce'''</span></center><center><imagemap> |
Image:Tagar_the_Fierce.png|500px |
Image:Tagar_the_Fierce.png|500px |
||
| − | rect |
+ | rect 295 202 437 220 [[Tagar_the_Fierce|Tagar the Fierce]] |
| − | rect 287 226 459 249 [[ |
+ | rect 287 226 459 249 [[Tagar_the_Fierce|Tiga the Fierce]] |
| − | rect 282 251 454 274 [[ |
+ | rect 282 251 454 274 [[Tagar_the_Fierce|Tigarians]] |
| − | poly 516 453 697 434 675 252 734 136 735 91 652 151 627 78 552 79 503 174 [[ |
+ | poly 516 453 697 434 675 252 734 136 735 91 652 151 627 78 552 79 503 174 [[Tagar_the_Fierce|Tiga the Fierce]] |
| − | poly 87 464 252 450 257 171 205 56 185 41 120 42 87 129 26 68 2 72 [[ |
+ | poly 87 464 252 450 257 171 205 56 185 41 120 42 87 129 26 68 2 72 [[Tagar_the_Fierce|Tagar the Fierce]] |
| + | desc none |
||
| + | </imagemap></center> |
||
| + | |} |
||
<br\ /> |
<br\ /> |
||
| Line 260: | Line 317: | ||
==Skills== |
==Skills== |
||
| + | {| width="100%" |
||
| − | |||
| + | |<center>[[File:Blood_rose_assassins_350x421.png|200px|link=http://chroniclesofherenvale.wikia.com/wiki/Blood_Rose_Assassins_%28Force_Aura%29]]</center> |
||
| − | |||
| + | <center>[[Blood_Rose_Assassins_(Force_Aura)|'''<span style="font-size:20px; color:#6D202D;">Blood Rose Assassins</span>''']]</center> |
||
| − | |||
| + | |<center>[[File:Fae_hunters_350x421.png|200px|link=http://chroniclesofherenvale.wikia.com/wiki/Fae_Hunters_%28Demonic%29]]</center> |
||
| − | <br\ /> |
||
| + | <center>[[Fae_Hunters_(Demonic)|'''<span style="font-size:20px; color:#295905;">Fae Hunters</span>''']]</center> |
||
| − | |||
| − | + | |<center>[[File:Praestor_knights_350x421.png|200px|link=http://chroniclesofherenvale.wikia.com/wiki/Praestor_Knights_%28Shield%29]]</center> |
|
| + | <center>[[Praestor_Knights_(Shield)|'''<span style="font-size:20px; color:#000000;">Praestor Knights</span>''']]</center> |
||
| − | |||
| + | |} |
||
| − | [[Blood_Rose_Assassins_(Force_Aura)|'''<span style="font-size:20px; color:#6D202D;">Blood Rose Assassins</span>''']] [[Fae_Hunters_(Demonic)|'''<span style="font-size:20px; color:#295905;">Fae Hunters</span>''']] [[Praestor_Knights_(Shield)|'''<span style="font-size:20px; color:#000000;">Praestor Knights</span>''']] |
||
| − | <br\ /> |
||
| − | <br\ /> |
||
| − | |||
==Items== |
==Items== |
||
Latest revision as of 14:54, 24 May 2015
Welcome to the Chronicles Of Herenvale Wiki[]
<br\ />
This Wikia is about a MMORPG game, Chronicles Of Herenvale. It is available on a few websites, (Facebook, Kongregate, Armor Games and the CoH Site). The game is also playable through the app. It's available for Android and iOS. It is programmed and maintained by Christian Primozich, the founder of Mososh. <br\ /> <br\ /> We are quite short in members. If you spot mistakes feel free to edit them. Here is the To-Do-List, it's shows what still needs to be done.
Game Help[]
<br\ /> Game Guide by Nankho<br\ /> Beginner Guide by Aiochul<br\ /> Guide by ElvenSavior<br\ /> FAQ<br\ /> Secret Locations<br\ /> Hide award popup<br\ /> Library<br\ /> <br\ /> <br\ />
Quest Locations[]
<br\ />
| Quest Location | Treasure Shop |
| <br\ /> | |
| Hygarth Treasure Shop<br\ /> | |
| <br\ /> | |
| Hygarth Treasure Shop<br\ /> | |
| <br\ /> | |
| Windown Treasure Shop<br\ /> | |
| <br\ /> | |
| Oakgate Treasure Shop<br\ /> | |
| <br\ /> | |
| Hidden Cove Treasure Shop<br\ /> | |
| <br\ /> | |
| Kirsinti Treasure Shop<br\ /> |
<br\ /> <br\ /> <br\ /> <br\ /> <br\ /> <br\ /> <br\ /> <br\ /> <br\ /> <br\ /> <br\ /> <br\ /> <br\ /> <br\ /> <br\ /> <br\ /> <br\ /> <br\ /> <br\ />
Adventures[]
Quest Locations
<br\ />
 Adventures: Tombs of Kragstaad<br\ />
<br\ />
Adventures: The Tombs: Part II<br\ />
<br\ />
Adventures: The Tombs: Part III<br\ />
<br\ />
Adventures: The Tombs: Part IV<br\ />
<br\ />
Adventures: The Plane of Havoc<br\ />
<br\ />
Adventures: Tombs of Kragstaad<br\ />
<br\ />
Adventures: The Tombs: Part II<br\ />
<br\ />
Adventures: The Tombs: Part III<br\ />
<br\ />
Adventures: The Tombs: Part IV<br\ />
<br\ />
Adventures: The Plane of Havoc<br\ />
<br\ />
Shops
<br\ />
![]() Merx's Enchantments
<br\ />
Merx's Enchantments
<br\ />
![]() Sary's Treasure Shop
<br\ />
Sary's Treasure Shop
<br\ />
Raids[]
 |
 |
 |
 |
 |
 |
 |
 |
 |
 |
 |
 |
 |
 |
 |
<br\ />
 |
 |
 |
 |
 |
 |
 |
 |
 |
 |
 |
 |
<br\ />
Information on how to calculate Raid Damage can be found here.Ultra Raids[]
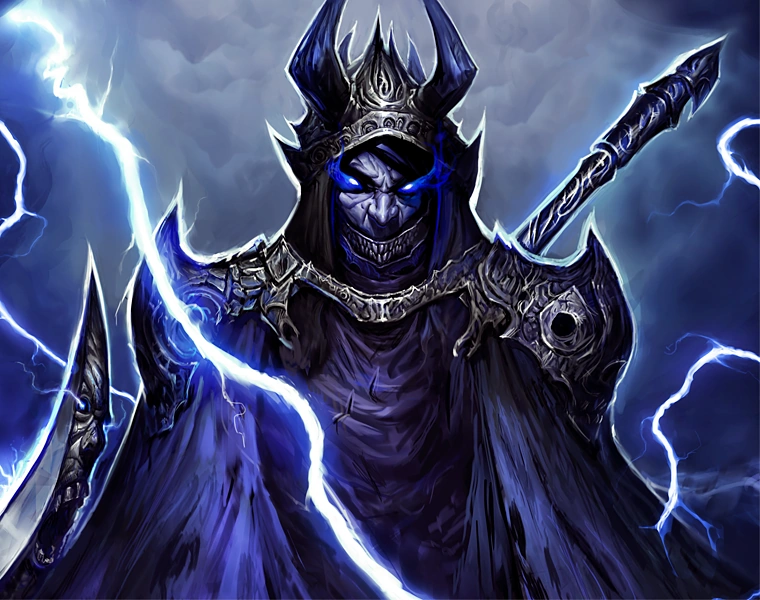
<br\ /> All the names and images in the pictures are click able and will lead to the appropriate page. Just click the name or picture of the boss you need more information on to get redirected to that page. Malikar is currently resting but the pictures are still click able and will lead to the appropriate page. <br\ />
 |
 |
<br\ /> <br\ />
 |
 |
<br\ /> <br\ />
 |
 |
<br\ /> <br\ />
 |
<br\ />
More information about Raids in general can be found here. <br\ /> Information on how to calculate Raid Damage can be found here.
Skills[]
 |
 |
 |
Items[]
<br\ /> Armor<br\ /> Weapons<br\ /> Jewelry<br\ /> Crafting<br\ /> Scrolls<br\ /> Treasure Chests |}